
In my search for information, I was unable to find a perfect guide on how to create a vision board. I had to do a lot of research to take a lot of notes to get mine created. That’s the reason I wanted to write this article. I wanted to take all the information I gathered and organize it in a way that anyone could use and create the perfect vision board for them.
But before we get too deep, if you need to know what a vision board is or why we want to use one, you can head over to part one and get my take on what this experience is all about
Physical vs Digital
You can likely make this decision after step 2, but I wanted to cover it here just so it is in the back of your mind as you’re planning your vision board.
The majority of people that I’ve seen create physical vision boards. They seem to love the creation process of physically cutting the pictures out and pasting them to a bit of poster or cardboard. It seems to help with creating a positive overall experience. Also, having something physical to look at sits better with a lot of people in this mostly digital age. Think of the people you know who still read paper books instead of on a Kindle. There’s something to be said for a physical object that you can see and feel. And it’s a physical representation of the ideal life that your vision board will help you create!

I myself (and a few others that I have watched) created digital vision boards. The reason is pretty simple: most people are looking at some sort of screen for large portions of the day. I’m in IT and I’m looking at a screen at least 8 hours a day for that. Not to mention the digital project that is ongoing and the occasional video game. For me, a digital vision board was a no-brainer, and what I’ll be covering most in this article. However, I believe the principles apply whether the media is paper or 1’s and 0’s.

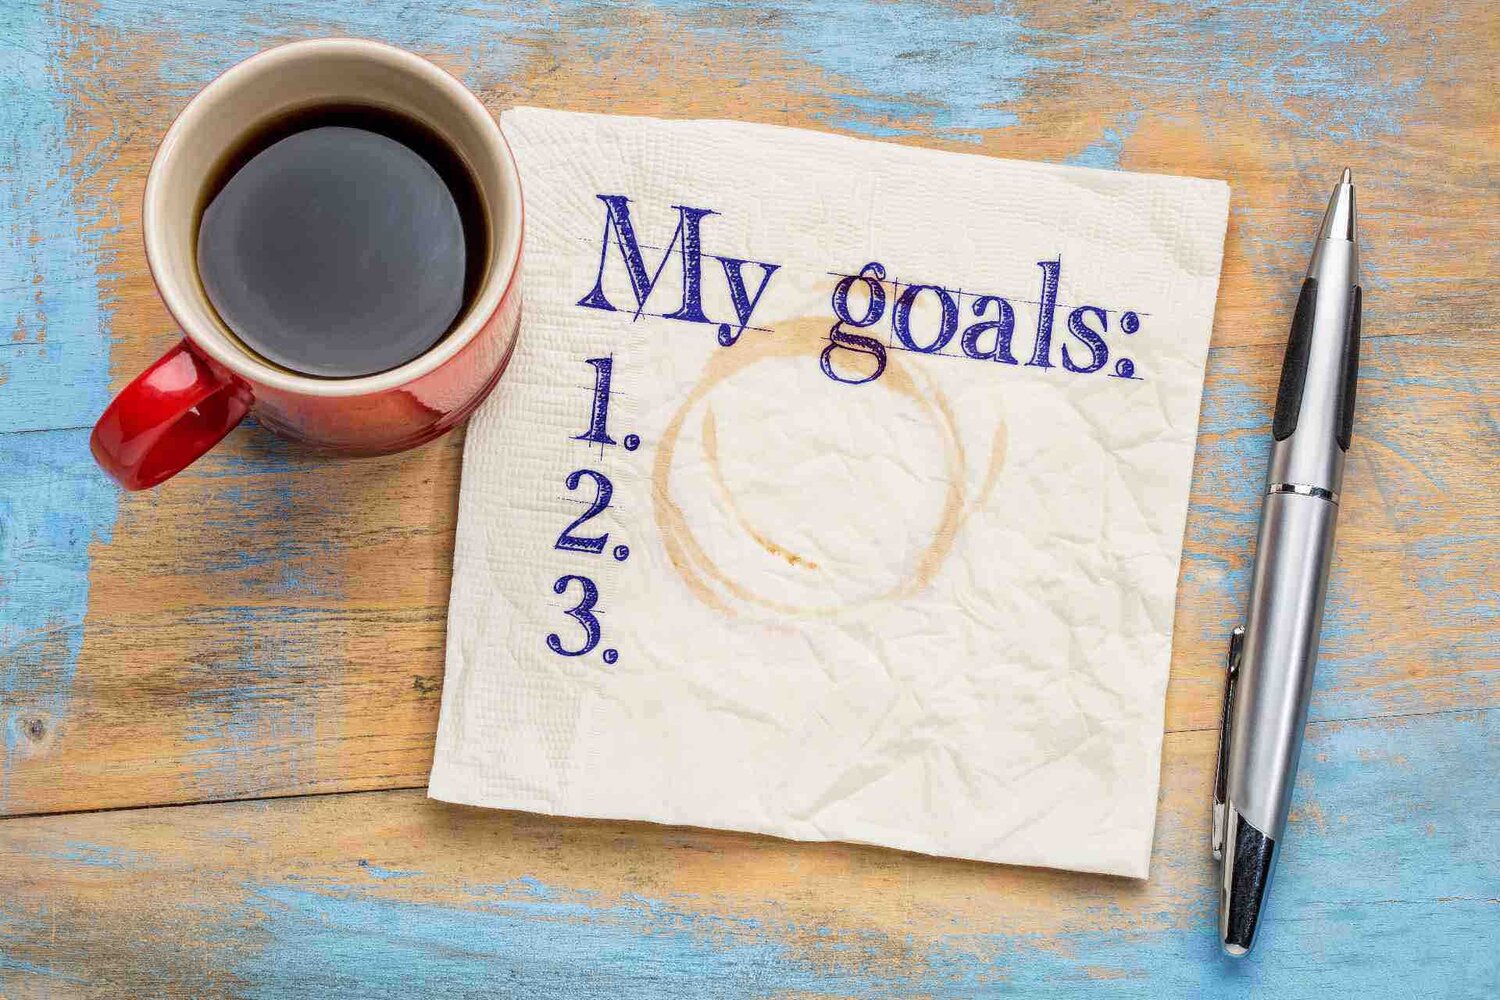
Step 1, Create a List of Goals
The first thing I believe you should do to make creating a vision board a smooth process is to create a list of goals for yourself. The goals can be towards anything that makes your ideal life. What’s your dream job? What’s the right amount of income? Want a relationship to improve? All of those things can be applicable.
I made some notes of goal types I found while viewing the list of videos from part 1 of this series. I’ll impart that list here.
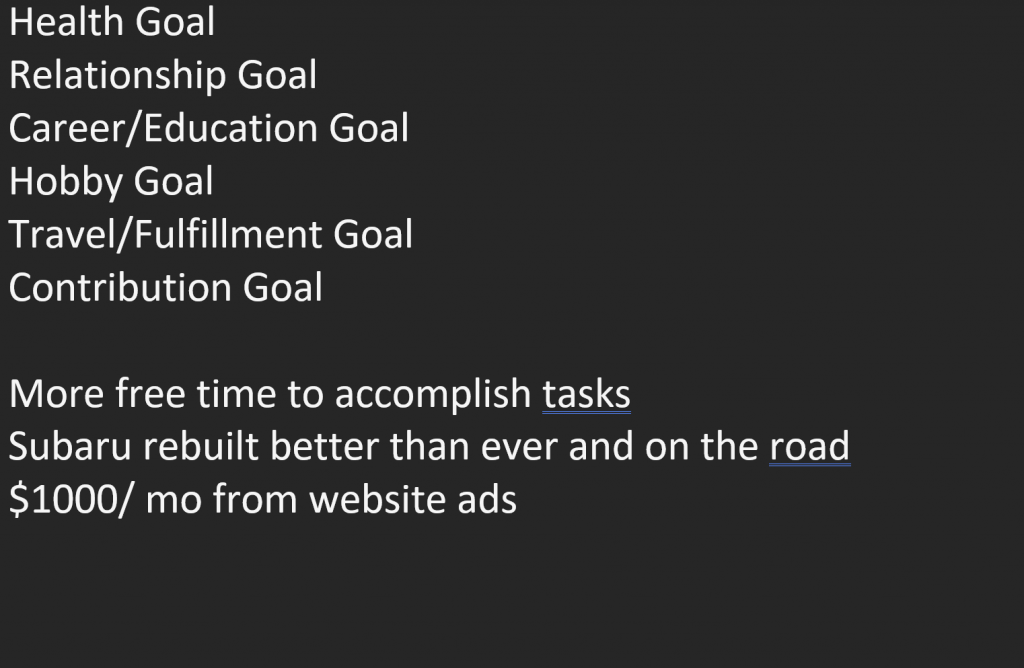
- Wealth goals – ambitions of more income, more savings, or financial freedom.
- Reputation goals – looking to increase social media following.
- Spiritual goals – working towards being a better follower of your chosen deity.
- Love goals – searching for the right partner or strengthening your love for self, spouse, or children.
- Health goals – wanting to become leaner, stronger or more fit in a certain area. Looking to improve resistance to ailments or reduce effects of illness.
- Relationship goals – improve your relationship with your spouse or children, network with more like-minded people, or improve your ability to connect with others.
- Career goals – work towards getting promoted at your job, finding a less stressful job, or finding a dream job.
- Education goals – learning a new skill, completing a degree or certification, or studying for self-improvement.
- Hobby goals – making time to start a new hobby that you’ve been eyeing or improving your performance in a current one.
- Travel goals – moving to a new location, seeing certain parts of the world, or traveling to all 50 states or 7 continents
- Contribution goals – increasing the amount of time/energy/resources to your job or an organization you belong to.
I’m sure there are more out there, but this should give you an idea of the variety of goals that you can have on your vision board and hopefully show you that there aren’t really any limits to what you can dream of.
The way that I started this process, once I knew what I could envision, was to write down a few things that I wanted to accomplish within the year. I made some of them that were relatively easily attainable. Others I pushed the reasonable limit of what I believed could be accomplished this year. When you’re focused on achieving things, you’d be surprised at what you can do with the time you have if you’re making consistent steps.
A word of caution though: try not to use words that are negative or bring a negative emotion, even when focusing on the elimination of those things. Instead of working towards being debt free, put something like financially secure. Negative emotions are strong, and most people are likely to focus on the word debt (which can stir up said negative emotion) rather than focus on the positive outcome. If you read it, and it doesn’t give you a warm fuzzy, then try a different approach that means the same for your ideal life.

Step 2, Find Images
The next step is to find the images that match the goals that you want to have on your vision board. Choose 5 to 10 goals that you want to achieve and head to Google, Pinterest, or whatever image site suits your fancy. So if one of your goals is to get that dream job this year, find a picture of someone doing that particular job and save it. Looking to buy your dream car or home this year? Find pictures of the ones you want, with the features you want, and save them to use on your board.
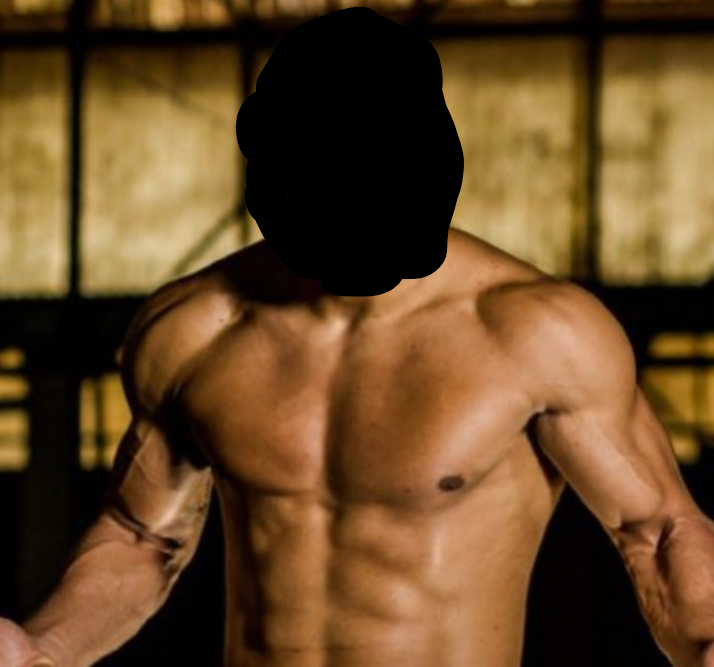
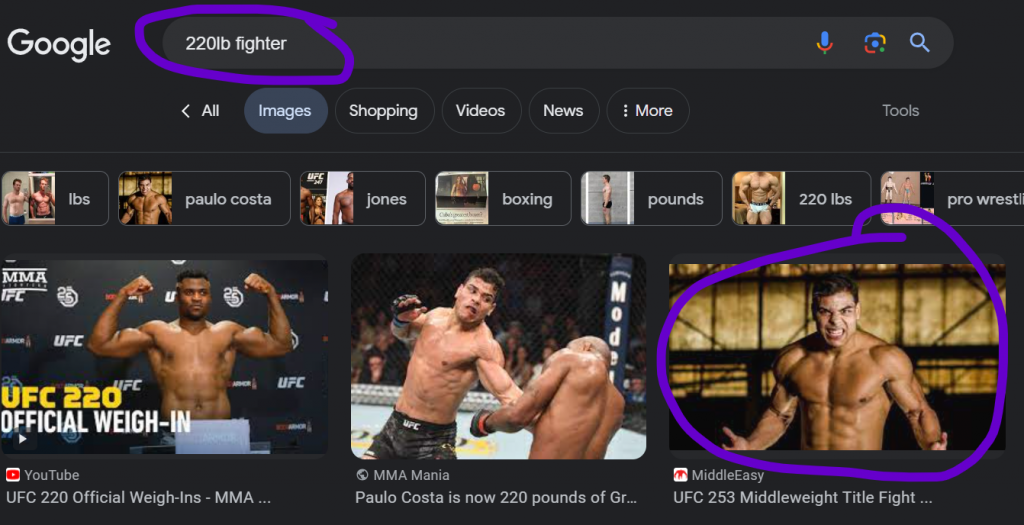
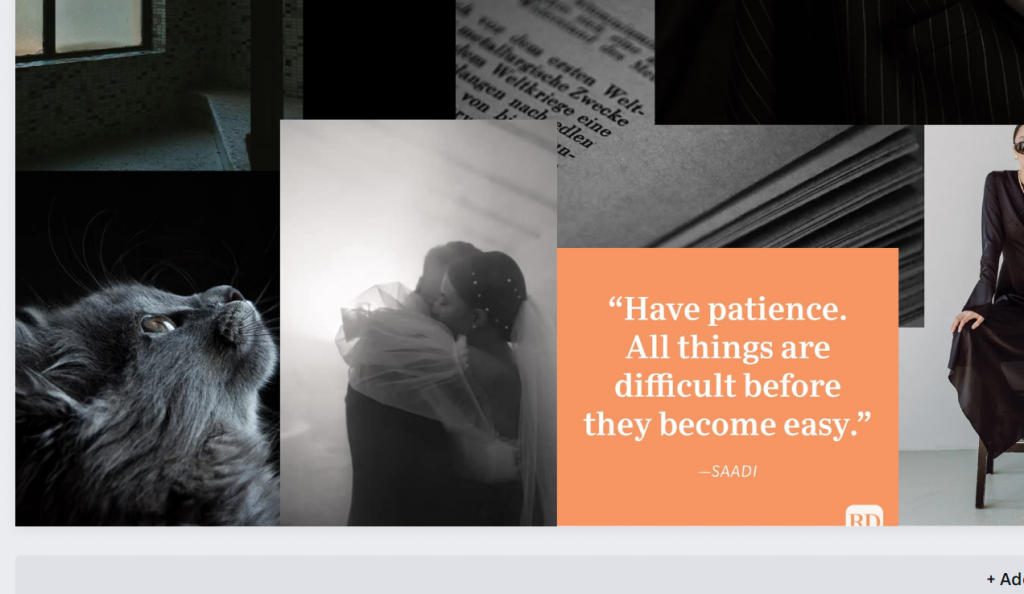
When I was doing this task, I looked to be as specific as I could with the pictures I used. One of my goals for 2023 was to lose 30lbs so I can reach 220lbs for the first time in a long time. I went so far as to look for a picture of a “220lb fighter” to use on my board. To make it specific, I blanked out the person’s face and I added a caption: “Lose 30 lbs to reach 220”. Some go as far as photoshopping their own face on the picture just to make it more real. I did not take it that far personally, but if you have a hard time imagining yourself in a certain “vision”, that might make it work better for you.
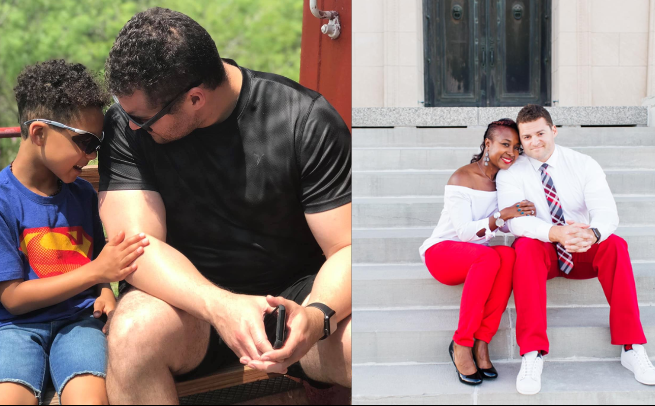
I also chose pictures to make me feel the emotions I was trying to create in my ideal life. For example, one of the goals I have is to have better relationships with my loved ones. Besides a caption that says exactly that, I used images that evoked memories or feelings of what that ideal life would look like. I chose pictures of interactions with my wife and child that made me feel the way I intend to feel once that vision has become a reality. The emotion what you need to focus on, and it will help with how you use the vision board, which we’ll talk about later.
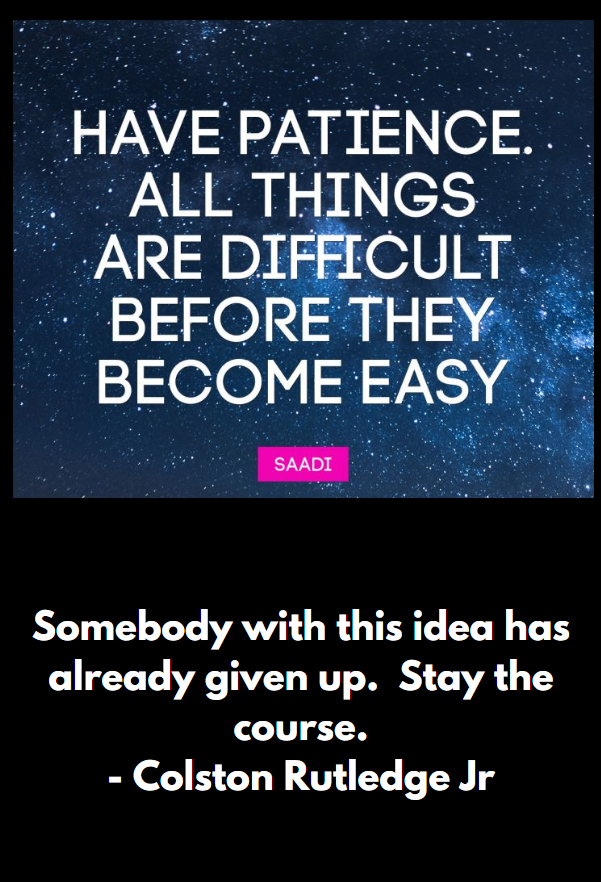
Other things you can put on your vision board are random pictures or quotes that evoke positive or inspiring feelings. If you have a quote in your email signature line or just something that comes to mind that puts you in the right space, add it. This way, when you look at your board, all of the visions you have for your ideal life are reinforced with positive and inspiring feelings that can help when times get difficult. I personally have 2 quotes on my board of things that inspire me to keep at it. And I need them because the vision I have for my ideal life is not easy to get, but I know it will be well worth it if I stick to the plan and keep pushing.
Step 3, Create Your Vision Board
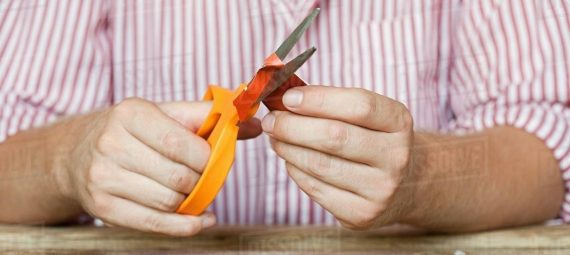
With the first two steps out of the way, this part will be fairly simple. If you decided to create a physical vision board, you would first print out the images that you selected. Earlier I said to choose 5-10 goals to have on your vision board. However, there are no rules saying you can’t have more than one image for a particular goal. This is a collage after all. Fill up your board with images and colors to your liking. And viola! You have your ideal life in pictures! I feel that the skills needed for this were gained by everyone in grade school, so I’m not going to tell you how to cut out pictures and paste them to a board. However, you can let me know in the comments if you’d like me to add a video of someone doing just that.
Going digital is a little harder for some. Not everyone is good with tech, and even then, not everyone is good with both tech and art. I’m one of the techy but not artsy people, so I decided to watch a video on how to use Canva to create my digital vision board. Don’t worry: Canva is free. You just need to sign up for a free account. They have some upgraded options that are paid, but I was able to get a design together that I love without paying. The video I used is below. Feel free to watch the whole thing, but the part about using Canva starts at 4:29:
I’m going to summarize the process I used to create my vision board. It won’t have every detail in it, but it should get you farther than I could by myself.
- Navigate to https://canva.com and sign up/login. Again, this is free and made easier as it can use a Google account to do both registration and login.
- Next you want to choose the size of your design. They have a bunch of pre-made sizes already in the list. However, I have an iPhone 13 Pro Max and a 4K computer monitor, so I decided to use the “Custom size” button and create the exact size I wanted. Tip: you can Google your phone resolution to get the correct size for your design if you don’t know it.
- Next, you’ll need to set up your design for how you want your vision board to look. If you’re artsy, you might look at that blank sheet with excitement. For many of us, that blank sheet gives us anxiety, so we used a template. If you head to the “Search templates” box and type “collage” or “mood board” and press enter, you’ll be greeted with a myriad of choices, both for free and for pay. And you can choose any of the ones you desire. Which can be a con if you’re indecisive like me. “The problem is choice.” – Neo
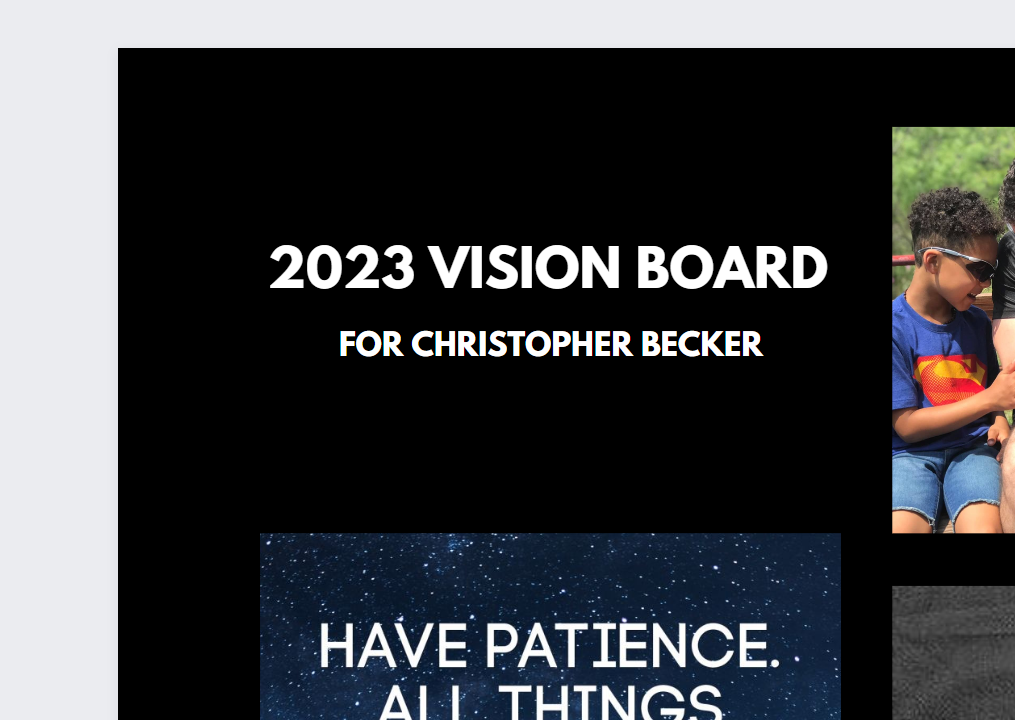
But don’t worry: you cannot make a wrong choice in this. Choose whatever floats your boat when it comes to the design. Me personally, I needed it to be easy on the eyes, so I chose a template that separated things with colors that I liked. Here’s what I came up with: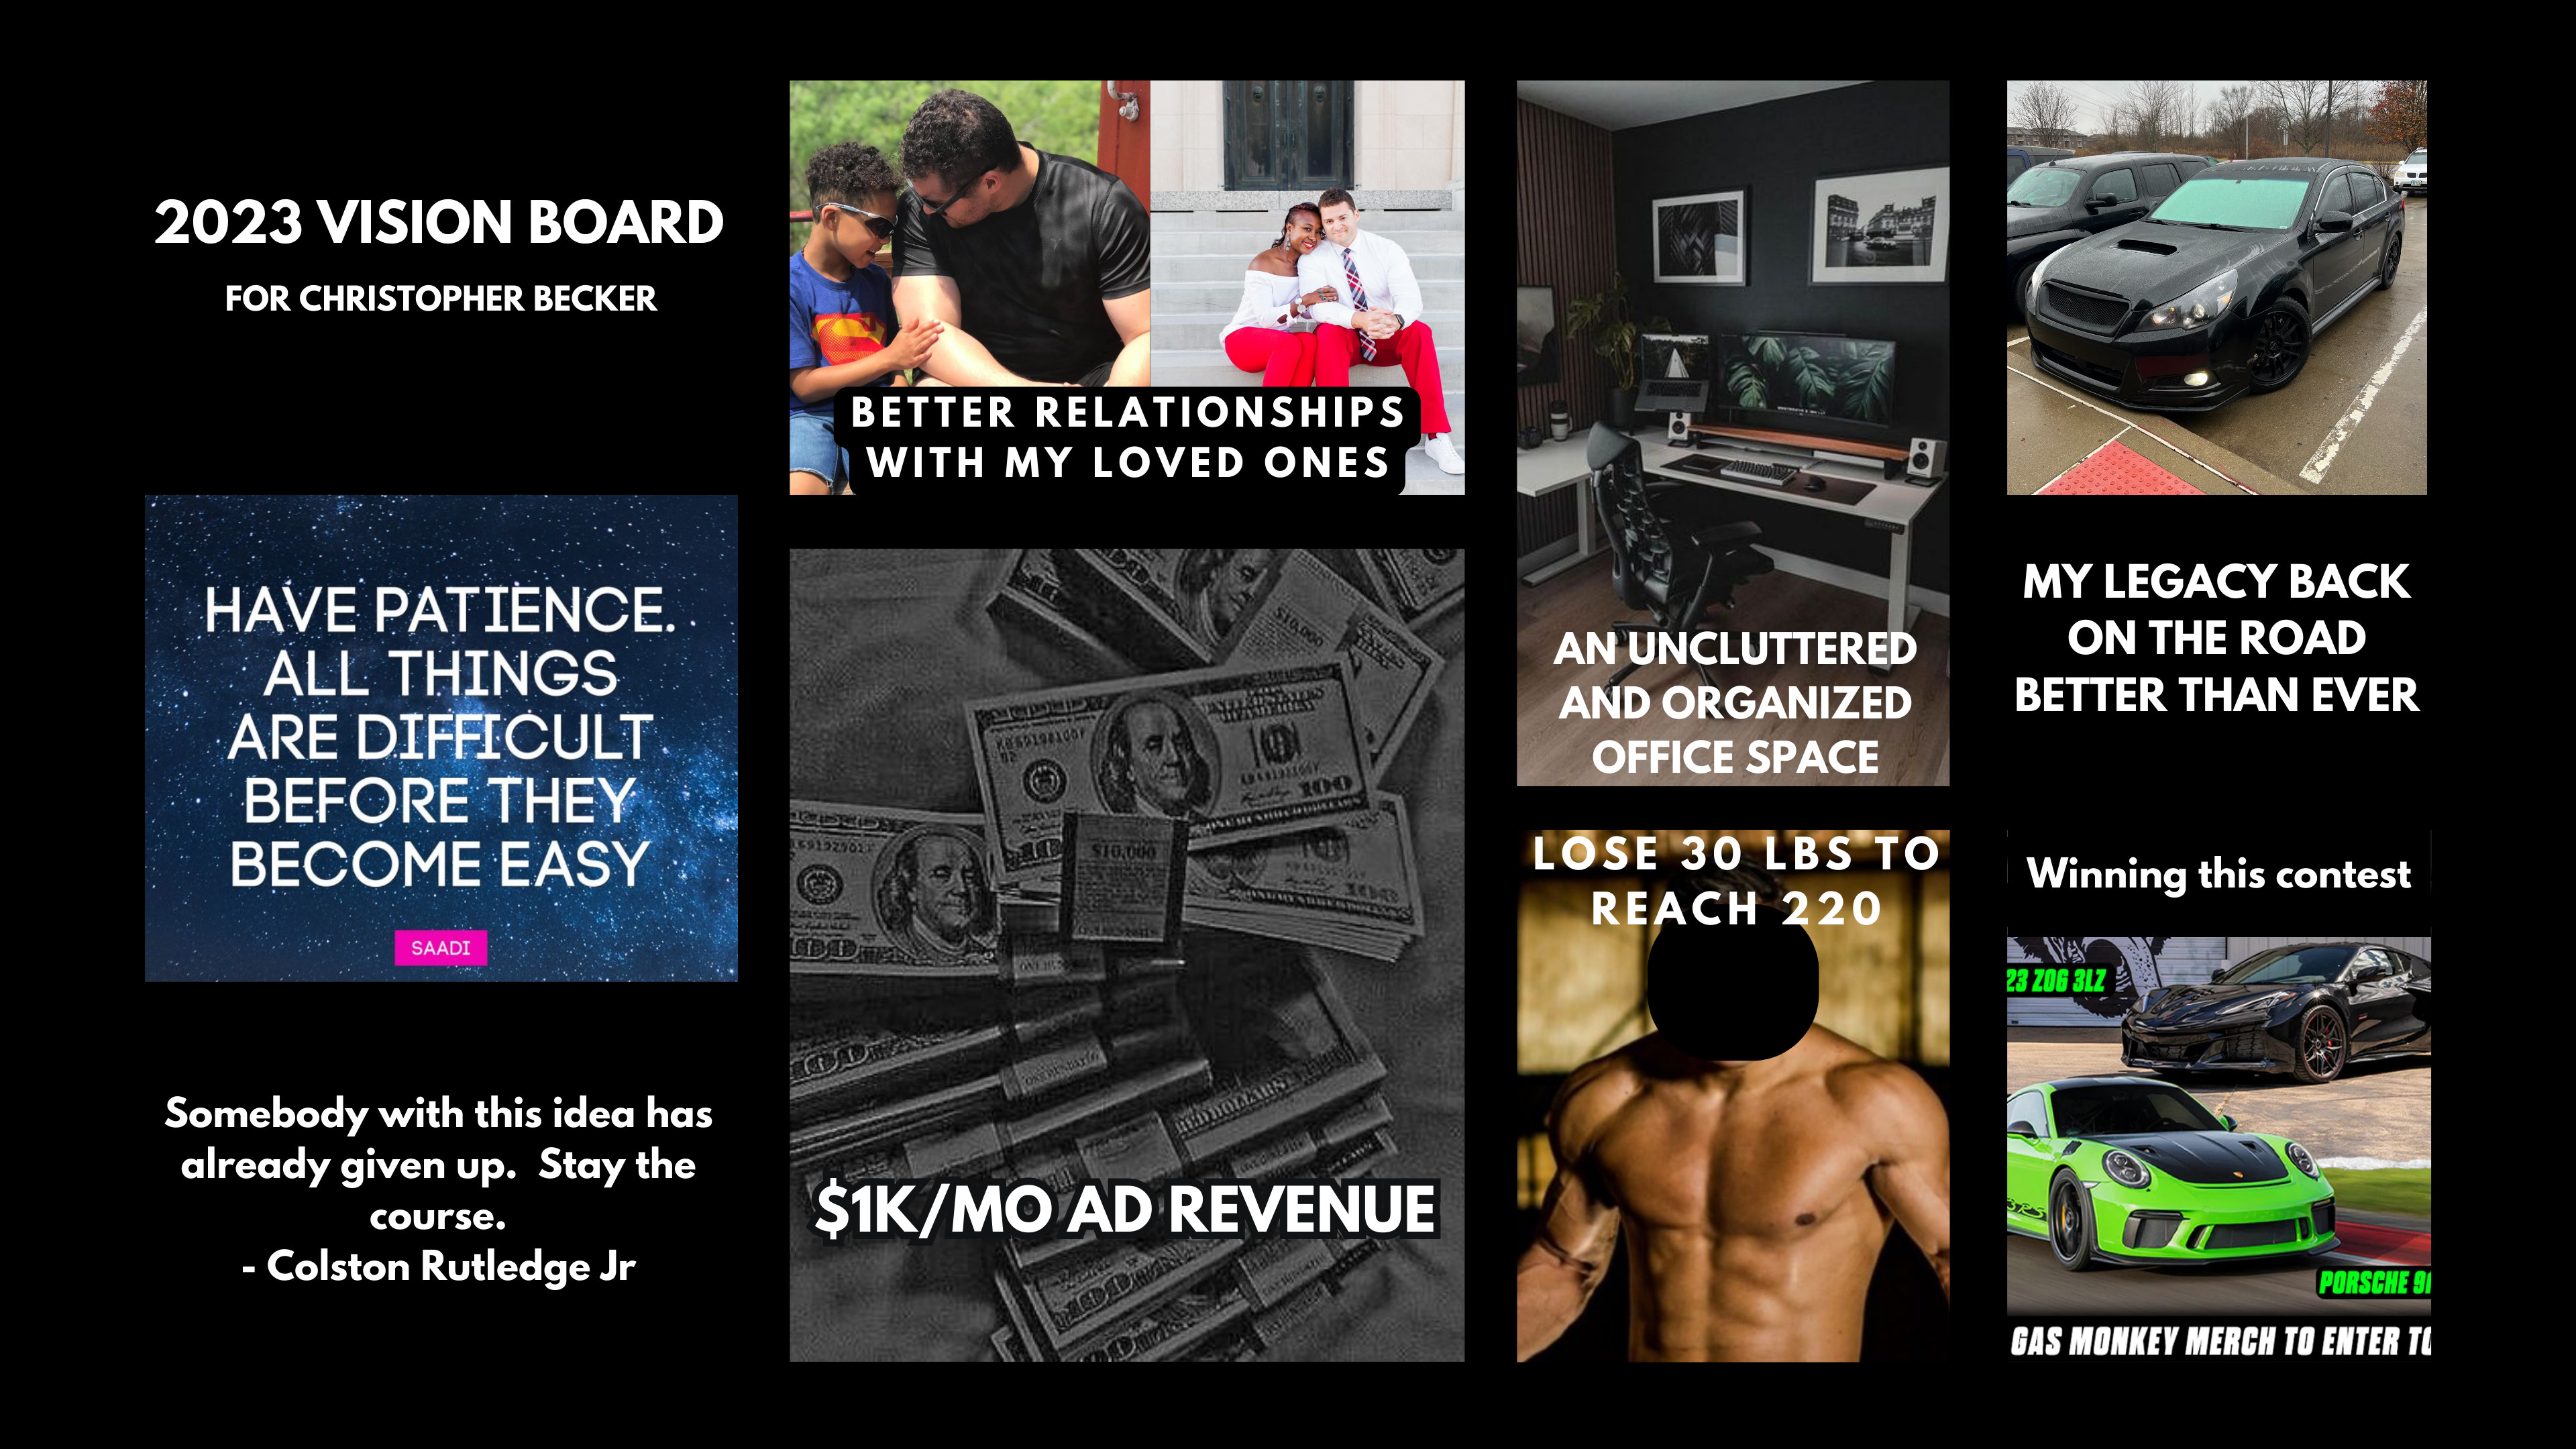
My friend, who has a completely different personality than me, came up with this: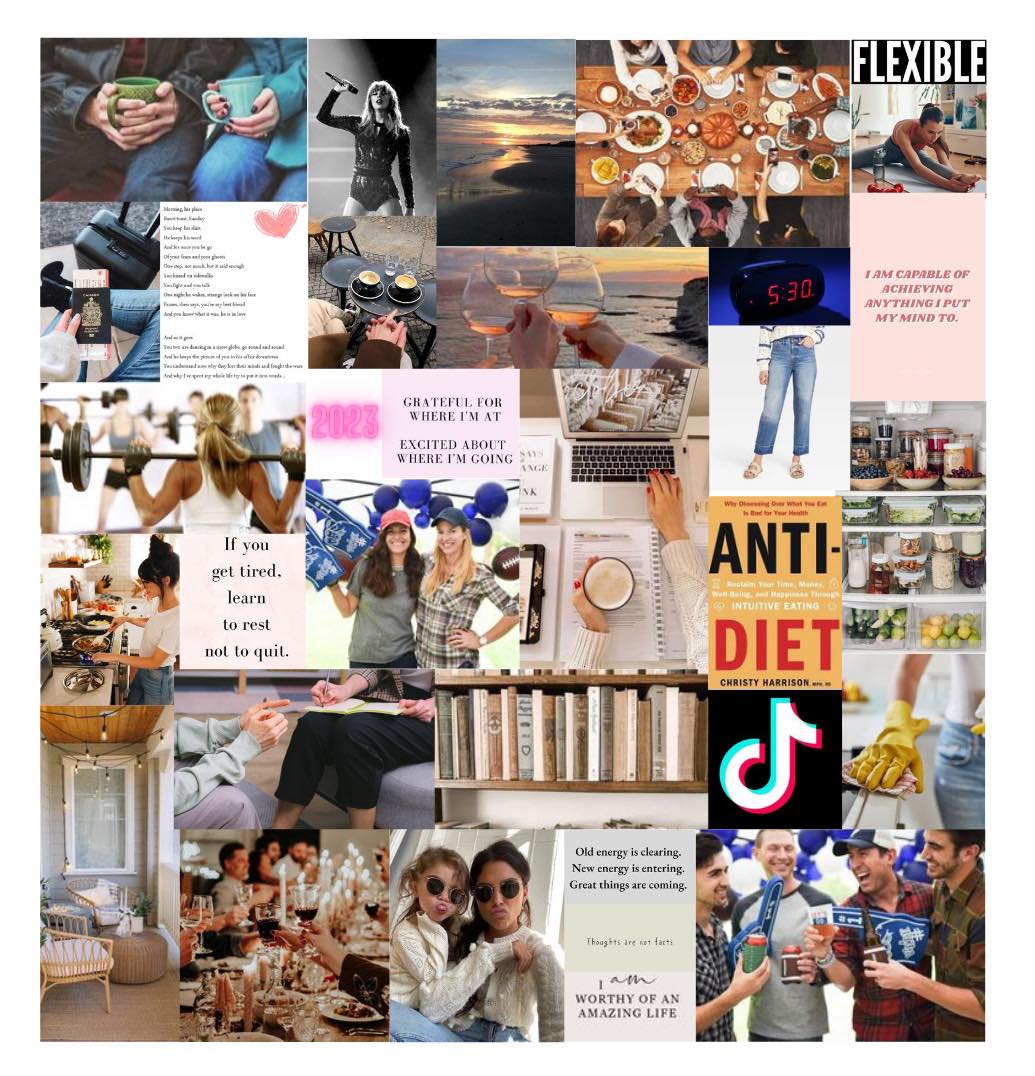
Like I said, there’s no wrong way to do this. Just do it! - Once you’ve chosen a design, upload your pictures to Canva. You can do this as one big task where you upload everything at once so that it’s ready for the next step. These will appear in the “uploads” tab on the left side of the screen.
- Then add pictures to your design. In most templates that I’ve seen, you can select a box where you want a picture, delete the picture that’s in there, and then drag a picture from your uploads to the box. Then you can manipulate the picture, add text to it, filter it, and all sorts of stuff. Repeat this process until you have all of the pictures that represent the goals you have for your ideal life on the board.
- If you’re adding quotes, you can go to Google Images and enter the quote you want to search for. This will usually provide you with a picture someone else has already made for that inspiring quote you chose. If you can’t find one to your liking, you can also add a picture box to your design, add a picture you like, and use the “Add a text box” button to add the quote manually.
- Optional: I also added a very specific title as the energy I want to evoke when looking at my vision board is that all of the stuff on it is for me. You’ll notice my friend did not do the same. To each their own, but I see some merit in helping to imagine these visions become your ideal life.
- Once you’re satisfied with how the vision board looks, click the “Share” button in the upper-right corner of the screen, then click the download button. Now you have the image saved to your computer or phone and can use the display properties to add that as your background.

And viola! A digital vision board to help you build your ideal life!
A Quick Note on Dream Boards
If you decide that you want to create a dream board, the process is the same as creating a vision board. Create goals, choose images to match, and design your board. The only difference is that the goals you conjure up answer a different question. That question is: “What would my life look like if it could look like anything?”
“Anything?”
“Anything.”
“ANYTHING!”
Kudos to you if you get that reference.

I plan on creating a dream board in the near future, then using vision boards to walk my ideal life towards that mark.
Now what? How do you actually use this thing? Head over to Part 3 and let’s talk about it.